To perform the reset tiens what to do is the following:
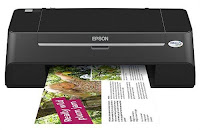
Hay que presionar y mantener apretado el boton de LOAD/EJECT (tomar hoja) y el de Cleaning (limpieza) . We must press and hold the button LOAD / EJECT (take up) and the Cleaning (cleaning).
Mientras mantienes apretados esos botones , tienes que presionar el boton de POWER (encendido) y tenerlo apretado hasta que las luces (ink out – tinta vacia y paper out- falta papel) empiezan a titilar o parpadear. While holding these buttons, you must press the power button (on) and keep it tight until the lights (ink out - empty ink and paper out-out of paper) start to flash or flicker.
Cuadno suceda esto suelta todos los botones. When it has to happen this release all buttons.
Cuando pasen 3 o 4 segundos apreta y mantenlo apretado el boton de CLEANING (limpieza) hasta que las luces que titilaban dejen de hacerlo. When you spend three or four seconds click and hold down the button CLEANING (cleaning) until the lights flickered stop.
YA ESTA!!! NOW THIS! ya quedo lista para usarla!! and am ready to use!
Seria conveniente que cada vez que se haga este procedimiento hacer una limpieza a la esponja interna de la impresora, por que alli deja depositado todo el exceso de tinta de la impresora y podria derramarse. It would be desirable that each time you do this procedure done to clean the sponge inside the printer, because there left on deposit all excess ink from the printer and may spill. Esto no es 100 % necesario pero seria muy bueno que lo hagas. This is not 100% necessary but it would be very good to do so.
Posted in:
1160,
Epson,
resetter,
stylus
|
|
|
Reset a Cero del Contador de Nivel de tinta Residual.
1. Apague la Impresora
2. Retentiendo el botón Resume/Cancel presione el botón POWER y mantenga presionado ambos botones- El indicador luminoso tomará el color verde.
3. Suelte el botón Resume/Cancel, continúe reteniendo el botón POWER
4. Presione y suelte el botón Resume/Cancel una vez, reteniendo el botón POWER aún.
5. Presione nuevamente el botón Resume/Cancel y luego suelte ambos botones a la vez.
6. Cuando el indicador se quede en verde presione y suelte el botón Resume/Cancel por 4 veces
7. Apague la impresora mediante el botón POWER para que la configuración sea guardada. Si no se apaga en el primer intento presiónelo nuevamente.
8. De no quedar perenne la solución, ejecute el siguiente programa luego del procedimiento.
Yo por mi parte investigue y encontre un programa que directamente resetea el contador de tinta para la ip1500, pero tambien funciona con la ip1000.
download resetear
Readmore...
Posted in:
Canon,
ip1000,
k10241,
PIXMA,
resetear
|
|
|
Adjustment program or software resetter for Epson PictureMate printer. On the internet I found two versions of Adjustment program for printers PictureMate, but it seem when the program run, there no difference about the both program. I tested to run this adjustment version in my computer, it no date setting requires like other adjustment program for epson printers. The PictureMate Adjustment program software can be used copy EEPRsaya data, Head Cleaning, Inkcharge, Check patter, reset waste ink counter and many again.
I dont know this software support for all Epson printers PictureMate version or not. But to use this software not differ with other adjustment program version. Here the screen shot of the adjustment program.
 How to use this software
- Download (view download link below) and extract the software. Then Run this Adjustment program. Click particular adjustment button
- Change the adjustment setting and adjust to your printer type
- Select consumable maintenance counter, then click ok.
- Click initialization button, finish
To download this software visit this link,
Adjustment Program PictureMate (435k)
Posted in:
adjustment,
Epson,
for,
picturemate,
printer,
program
|
|
|
Epson SX105 and SX106 Adjustment Program FIX PRINTER ERROR "parts inside printer end service life, waste ink pad counter overflow error"Please follow the steps below to reset the protection counter effectively.
- Double click AdjProg.exe.
- Click “Accept” button.
- Click "Select" button. and select your printer model then click "OK"
- Click “Particular adjustment mode” button.
- Select on “Waste ink pad counter” and click “OK” button.
- Click on “Initialization” button and the program will reset the protection counter.
- Turn off the printer as a program instructed then turn on again.
- Click “Finish” button. and its done!
Warning: You might end up with ink leaking out of the printer if you dont either replace the waste ink pad or install external waste bin.
AdjProg.exe
Posted in:
and,
counter,
Epson,
how,
of,
protection,
reset,
sx105,
sx106,
the,
to
|
|
|
How to Reset Canon IP2770 printer Error code 5B00
100% successful service tool.
Download Canon iP2770 Resetter v1074:
Go to the canon iP2770 printer Service Mode :
The printer is off and plugged the power cord.
Press the RESUME button two seconds
then press the POWER button until the green light flame (while pressing the POWER button, ... dont release RESUME button)
Then release the Resume button, but do not release the POWER button.
POWER button while still pressed, press the Resume button 5 times. Led will flash alternately orange glow green with the last orange. (not to mistaken 4x because the printer will be totally dead, but it is temporary as well) Then ...
Release both buttons simultaneously.
Led will blink briefly and then will glow GREEN.
The computer will detect new devices found, please ignore
This situation is called SERVICE MODE iP2770 and iP2770 ready to be reset.
Then run Canon iP2770 Resetter v1074 :
Extract the File iP2770 Resetter.
Prepare a two paper in the printer (to print at the time of the reset process).
Run the program iP2770 Resetter
Click "MAIN", then the printer will proceed and iP2770 will print one page with the words "D = 000.0"
Click the "EEPRsaya Clear".
Then click the "EEPRsaya", and the printer will print the results off iP2770 Resetter. One of the writing row as follows:
"TPage (TTL = 00 000)"
Turn off the printer by pressing the POWER button.
Thats Done ...
Posted in:
5b00,
Canon,
code,
error,
how,
ip2770,
printer,
reset,
service,
to,
tool,
with
|
|
|
Epson T27 Adjustment Program
FIX PRINTER ERROR "parts inside printer end service life, waste ink pad counter overflow error"Please follow the steps below to reset the protection counter effectively.
- Double click AdjProg.exe.
- Click “Accept” button.
- Click "Select" button. and select your printer model then click "OK"
- Click “Particular adjustment mode” button.
- Select on “Waste ink pad counter” and click “OK” button.
- Click on “Initialization” button and the program will reset the protection counter.
- Turn off the printer as a program instructed then turn on again.
- Click “Finish” button. and its done!
Warning: You might end up with ink leaking out of the printer if you dont either replace the waste ink pad or install external waste bin.
Posted in:
counter,
Epson,
how,
of,
protection,
reset,
resetter,
t27,
the,
to
|
|
|
Driver Download for Epson Expression Home XP-30 Driver
Epson Expression Home XP-30
- File name : epson374116eu.exe
- File Size : 15.90MB
- Version : 6.90
- Release Date : 18-Jun-2012
Compatibility and System Requirements :
- Windows 7
- Windows 7 (x64)
- Windows Vista
- Windows Vista (x64)
- Windows XP
Epson Expression Home XP-30 DriverSource direct link
Posted in:
30,
download,
driver,
Epson,
expression,
for,
home,
xp
|
|
|
Epson Stylus T10 and T11 Adjustment Program
FIX PRINTER ERROR "parts inside printer end service life, waste ink pad counter overflow error"
Please follow the steps below to reset the protection counter effectively.
- Double click Loader.exe.
- Click “Accept” button.
- Click "Select" button. and choose your printer model then click "OK"
- Click “Particular adjustment mode” button.
- Select on “Waste ink pad counter” and click “OK” button.
- Click on “Initialization” button and the program will reset the protection counter.
- Turn off the printer as a program instructed then turn on again.
- Click “Finish” button. and its done!
Warning: You might end up with ink leaking out of the printer if you dont either replace the waste ink pad or install external waste bin.
Posted in:
counter,
Epson,
how,
of,
protection,
reset,
resetter,
stylus,
t10,
the,
to
|
|
|
How To fix Error 13.09.00 indicates a paper delay jam has occurred.
Remove any stuck media from the fuser access area, the duplexer area (if equiped) or the face down (top output) bin.The fuser may have a sticky exit sensor and is sensing the paper is there too long and throws up a jam.
Posted in:
00,
09,
13,
4600,
Color,
error,
fix,
how,
HP,
laserjet,
on,
to
|
|
|
How To fix error message "clean sensor" on Epson Aculaser C2600
Le message "Clean Sensor" ou "Détecteur Nettoyage" a plusieurs causes.
Procedure 1:
The firts thing to do: open the cover (cover D):
Close it very slowly: it will clean the sensor.
Do it 2 or 3 times in succession:
Procedure 2:
Open the front cover (cover D)
Remove the waste ink box.
Clean the photoconductor wire: hold the cleaning knob and move it slowly in and out a few times (5-10 times):
Clean the exposure window: hold the knob (under the photoconductor cleaning knob) and move it slowly in and out a few times (5-10 times).
Put back the waste ink box.
Close the cover
Power off the printer during 5 minutes
Procedure 3: When using remanufactured toner.
Verify each toner.
Procedure 4:
Look inside the transfert belt if a roller did not go out of its axis.
Posted in:
aculaser,
c2600,
clean,
Epson,
error,
fix,
how,
message,
on,
sensor,
to
|
|
|

After a few day expreiment with my canon Pixma iP1700, I find two problem often happened when resetting the printer. First case, My Canon pixma Pixma ip1700 becoming Canon Pixma ip1300 after resetting the eeprom, second case, cartridge not recognize after resetting the counter then the led blinking 5X orange and 1X green..
1. My Canon pixma ip1700 becoming ip1300
My Canon Pixma iP1700 becoming canon Pixma iP1300, this problem happened after resetting the eeprom of Canon iP1700 using iPtool. The solutions for this problem :
- Install driver for canon iP1300, you can download the driver in the canon website.
- Now run iPtool software, auto recognize as Canon Pixma iP1300
- In the change model set the printer to iP1700.
- In the EEPRsaya Operations click reset button. Turn off the printer and turn on again, the problem solved now your Canon printer becoming Canon Pixma iP 1700 again.
2. Blinking orange 5x and green 1x and the color/black cartridge not recognized

This problem appear after several times reset ink level the cartridge. If
this reset methode does not work to solve the problem. I get this solution after several times try resetting using various combinations button. Solutions for the problem are:
- Start with printer off
- Hold down Resume button and press Power button.
- Keep holding down Power button and press Resume 2 times, then press and hold the resume button, release power button.
- Green lights will flash and then stop blinking (Keep hold the resume button).
- When green lights are solid, release resume button and press again the Resume button 4 times.
- Don’t switch of the printer (because if your trun off and turn on again the printer the problem still appear), Now reset the counter and EEPRsaya canon iP1700 using iPTool software (recommended).
- Turn off and turn on again the printer, the printer should respond as normal. In my Canon iP1700 problem solved.
Posted in:
after,
Canon,
ip1700,
PIXMA,
problem,
resetting
|
|
|
Here this step to reset Counter printer epson cx3900
- Switch on printer
- Set the computer date setting date to 23 january 2007
- Run adjprog.exe from the extracted folder
- Click accept
- Click particular adjustment mode
- Go to maintenance then Select waste ink pad counter then click ok
- Click on “check button” till its done then click on “initialization button” then click on “finish button”
- Switch off printer for 5secs then switch on again
- After you reset succesfully, you can change the date back to normal
Posted in:
counter,
cx3900,
Epson,
ink,
reset,
waste
|
|
|
Brother HL-7050 is a superior quality monochrome laser printer manufactured to meet your office needs. This quality and reliable printer comes with various useful and necessary features that can assist you and make your daily office work easier and more convenient.
The printer has the standard input capacity to accommodate up to 600 sheets and has the ability to print 30 pages per minute allowing you to complete your work assignments and print official reports in just a matter of few minutes. In addition to these features, the Brother HL-7050 has a 32 MB standard memory that helps you in saving your time by making use of the excellent functions available such as the last job reprint and print storing. The printer is user friendly being very logically designedand also has low running costs allowing you to save both time and costs with this reliable device.
The standard interfaces available in the Brother HL-7050 are parallel, USB and serial. You can also request for an optional Ethernet print server that will assist you in changing and monitoring the print function via a web browser. The Brother HL-7050 is suitable for businesses or official use that requires quick and quality monochrome output up to 30 pages per minute. You can also easily replace the accessories such as the toner cartridge and drum unit that is compatible with Brother HL-7050 and ensures that the high speed printing is maintained.
You can increase the standard input 600 sheet capacity to 2100 by adding some additional paper trays. The device can support a number of paper types and sizes like envelopes, legal, letters, transparencies, labels, A6, B5, B6 and A5. It has an decent 1200 x 1200 dpi print quality and a large range of industry standard emulations such as PCL6, Epson FX, IBM Proprinter XL, HP-GL and BR-Script 3. Any Brother toner cartridge can be used with this printer which adds a lot of versatility to it.
Other excellent features of the Brother HL-7050 are MAC and PC compatibility, 2-line LCD for descriptive printer status and parallel, USB, serial and optional Ethernet interfaces.
This monochrome printer is ideal for official use and with its distinctive and amazing features it allows fast quality text and image results fulfilling the ever changing official needs. It’s a no frills, no fuss printer that will produce decent quality prints day and night. It won’t let you down.
Readmore...
Posted in:
7050,
Brother,
hl
|
|
|
If you find yourself in the market for a monochrome laser printer, Kyocera might not be the first name that springs to mind. It is a company that sells large, reliable, commercial level printers to the business market, but it has recently introduced an entry-level laser printer, the FS-1100.
The standard gray color is complemented with a darker gray top and front. A neat circular status display on the top of the printer features green and orange LEDs to indicate paper and toner levels, paper jams and other warnings.
There is also a small triangular window in the middle of the output tray, which shows the part number printed on the top of the toner cartridge inside the printer. While this is an innovative idea, it isn’t something you need to know each time you go to the printer. The cartridges last 4000 pages, so unless you’re a super heavy users it’s going to be a while before you need to know. Then the status light will tell you anyway.
The paper tray holds 250 sheets, then there is a multi-purpose feed slot directly above it. This can be used to feed envelopes, leaflets or other different sized media. A single USB slot at the rear is the only connection available without having to upgrade to an ethernet adapter.
The printer only needs a toner cartridge to get it up and running. Kyocera uses a special coating for its drum which lasts the lifetime of the printer and needs no replacement. This drops the per sheet cost considerably, as well as improves the printers green credentials. When you first insert a toner cartridge, the printer runs through a five minute charging cycle to prepare the cartridge, but it only happens the once.
Kyocera quotes print speeds of up to 28 pages per minute, but our text document printed in draft mode still only achieved 24 pages per minute. In normal mode, which most users use, youre not likely to get much quicker than around 15ppm. Print quality is acceptable, with text print appearing black and showing straight lines, sharp edges and good fill.
While there isnt anything new and exciting about the FS-1100, low running costs and above average print quality make it an attractive proposition
Readmore...
Posted in:
1100,
fs,
kyocera,
mita
|
|
|
The configuration page (which is actually 2 pages) for the Phaser 8400 color printer contains a lot of information, including page count, installed options, available fonts, and network settings. To print the configuration page:
- On the main screen, "INFORMATION" should be the highlighted choice; if its not, scroll up or down until it is highlighted.
- Press the OK button.
- Scroll down to "INFORMATION PAGES."
- Press OK.
- Scroll down to "CONFIGURATION PAGE."
- Press OK.
Readmore...
Posted in:
8400,
configuration,
page,
phaser,
xerox
|
|
|
To print a configuration page or configuration report from a LaserJet 1536dnf MFP:
- Press the Setup button (the one with the wrench on it)
- "Reports" will be displayed on the screen; press OK
- Scroll to the right until "Config Report" is displayed
- Press OK
Readmore...
Posted in:
1536dnf,
configuration,
HP,
laserjet,
mfp,
page
|
|
|
Although the Ricoh MP C2030 copier is in the same family as the C2050 and C2550, the procedure for viewing the page count is slightly different, since the C2030 does not have the touch screen. To see the page count for a C2030:
- Press the User Tools/Counter button
- "Counter" will be displayed on the screen -- press the OK button
Readmore...
Posted in:
c2030,
count,
mp,
page,
Ricoh
|
|
|
Easy method to resset Printer Epson R230X Download SSC Service Utility
software. Click here to get the software. The steps: 1. Make sure
printer in the living conditions and are connected with a computer
(driver printer sudah terinstall) 2. Instal SSC Service Utility and run
the program 3. Setting configuration printer model.Choose Epson Stylus
Photo R230. then close the main window 4.At the bottom right
taskbar clik right icon SSC Service Utility, choose Protection Counter
-> clik reset protection counter -> choose Yes at pop up which is
ask “Have you Replace waste ink pad”
5. Restart printer, and printer no blinks anymore
get
Readmore...
Posted in:
Epson
|
|
|
To see the total page count for a Ricoh 1015, 1018, 1018D, or 1113 copier:
- Press the User Tools/Counter button
- "1. Counter" will be displayed; press the OK button
Readmore...
Posted in:
1015,
1018,
1018d,
1113,
aficio,
count,
page,
Ricoh
|
|
|
The reset method work for canon printers that using PG-40 and CL-41 cartridges. After doing this reset method your printer will not display low ink notification anymore and will not show error code “E4″ or “E5″. This method takes from indoreset yahoo group and prepared by Choy.
Here how, the method to reset ink level notification:
- Push “resume” for 5 seconds for canon IPXXXX. For canon MPXXX you must enter to service mode.
- Push Power switch then remove power cord.
- Insert plug power cord while pressing “power switch” at the same time.
- Push Start/reset by step 2 continue Wait display shown “0″
- Push + change display from “0″ to “1″
- Push color button 2 times
- Push Power switch again , Printer will print 1 page
- Open cover
- Unplug power cord
- Take out ink cartridge #40 and #41
- Insert plug again
- Push power switch
- Open cover (scan cover)
- Insert ink cartridge #40 and #41 again
Enter to service mode for canon MPXXX
- With the printer powered off but connected to a power source, press the Power button while pressing and holding the Stop/ Reset button.
- When the Power is lit, press the Stop/Reset button two times while pressing and holding the Power button.
- When releasing the Power button and the Stop / Reset button (regardless of order), the printer will move into a service mode. (Waiting for menu selection)
Posted in:
and,
Canon,
disabling,
for,
how,
ink,
ip,
level,
low,
mp,
notification,
to
|
|
|